Outdoor solar lighting is often easier to install than wired lighting because each fixture uses a small solar panel and a built-in battery. There is usually no cable to bury, outlet to reach, or electrical connection to arrange. Many path lights simply press into soil, while wall-mounted models use basic screws and a suitable outdoor surface. That feels simple. But the location still matters. A panel placed beneath a porch roof or dense tree may receive too little direct sunlight to recharge well. Before unpacking the lights, check the site at different times of day and note where shadows fall.
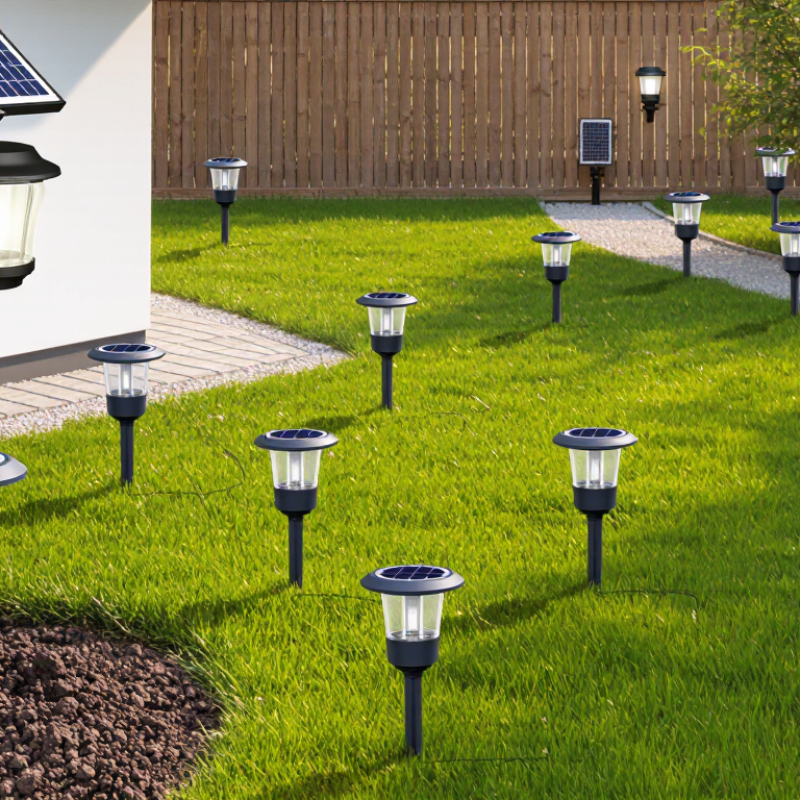
How to install solar-powered lighting outdoors depends on the fixture, so read its instructions before choosing tools or mounting points. For stake lights, loosen compacted soil and press the stake in gently; forcing it can crack plastic parts. For wall lights, use the supplied hardware and confirm the surface can support the unit. Leave the panel exposed, aim lights away from windows if glare is a concern, and keep fixtures clear of sprinklers and routine foot traffic. No trenching is needed. After installation, allow the battery to charge as directed, then check the light after dusk. Brightness and runtime can vary with weather, shade, battery age, and season. A common oversight is spacing lights by appearance alone; test a few positions at night before installing the full set. The process is straightforward, though not entirely foolproof. A little adjustment may be needed.
A solar outdoor light uses a photovoltaic panel to turn daylight into direct-current electricity. Photons reaching the panel free electrons in its cells, creating current that a charge controller directs to the rechargeable battery. At dusk, a light sensor signals the controller to power the LEDs from stored energy. No trenching. No mains cable.
The scale behind this simple process is substantial: IEA PVPS reported more than 1.6 terawatts of cumulative solar photovoltaic capacity worldwide by the end of 2023 in Trends in Photovoltaic Applications 2024. A garden light uses the same basic conversion principle, on a much smaller scale. Its daily performance depends on panel size, battery capacity, cloud cover, and exposure. Shade matters. A panel under a porch may collect too little energy, even on a bright day. In practical terms, positioning often matters more than the label suggests. That can be frustrating. Winter brings shorter days, so the battery may not fully recharge before evening. Keeping the panel clean and facing open sky helps, but it cannot make weak sunlight stronger.
Solar-powered outdoor lights arrive with the main electrical parts already matched: a photovoltaic panel, rechargeable battery, charge controller, and LED. That built-in system removes the need to run a cable from the house or connect the light to mains power. A stake or wall bracket usually handles mounting. Few tools are needed.
The controller regulates charging and switches the lamp on when daylight fades. Many models also include a dusk sensor or motion detector, so there is no separate timer to wire. U.S. Department of Energy Energy Saver guidance says LEDs use at least 75% less energy than incandescent lighting. That low demand helps a compact panel and battery power practical outdoor lighting. The number is a broad comparison, not a guarantee of runtime in every yard.
Still, integrated parts do not make placement irrelevant. A panel shaded by a fence or tree may collect too little sunlight, especially in winter. Check the panel’s exposure, then angle it toward open sky and keep it clear of leaves. Built-in batteries can also be difficult to replace, an easy detail to miss before buying. A simple installation works best when the light gets steady sun and its mounting surface stays firm.
A suitable location starts with an open view of the sky. Look for a spot that receives direct sun, not merely bright shade. Roof edges, fences, and overhanging branches can cast long shadows across a small solar panel. The World Bank Group and ESMAP’s Global Solar Atlas provides long-term solar-resource maps at roughly 250-meter resolution. That data helps compare neighborhoods, but it cannot show the shadow from one nearby tree. Check the exact spot in person.
Watch the location at different times of day, and consider how shadows change by season. A sunny midday visit can be misleading. Shade matters. If possible, observe the area in the morning and afternoon, then place the light where it serves a clear purpose, such as illuminating steps or a gate. Keep the panel free of leaves and dirt, and avoid aiming light directly into windows. Follow the fixture’s stated exposure guidance; required charging time varies by design and local weather. I still find it easy to overlook winter shade. Recheck the site after installation, especially if nearby plants grow or outdoor furniture moves.
How to Choose a Suitable Location for Solar Lighting
Approximate astronomical daylight duration at 40°N, rounded to the nearest tenth of an hour. Daylight hours are not the same as direct-sun charging hours. For better charging, place the solar panel in an open spot with minimal shade and orient it toward the equator—generally south in the Northern Hemisphere and north in the Southern Hemisphere.
Solar lights are simple to mount, but their position affects how well they work. Choose a spot that receives several hours of direct sunlight, away from deep shade, roof overhangs, and thick branches. Keep the panel facing an open part of the sky. In the Northern Hemisphere, a south-facing position often receives strong sunlight, though nearby buildings can change what works best. Before fixing a light in place, hold it at the planned height and check its beam after dark. A path light may need to sit lower than a wall light. Shade matters.
Tips: Clean the panel before installation. Use the supplied ground stake in firm soil, or secure a wall fixture to a stable surface with suitable screws. Avoid loose boards and locations where sprinklers regularly soak the panel. Leave enough room to reach it for cleaning.
Try to space path lights so their beams overlap slightly, rather than creating bright spots with dark gaps between them. For steps or entrances, aim the light toward walking surfaces, not directly into someone’s eyes. A small adjustment can make a real difference. Solar performance also changes with season and weather, so a location that works in summer may receive less winter sun. It is easy to assume one sunny afternoon proves the spot is ideal; check it over several days before settling on the final position.
| Installation Dimension | Recommended Outdoor Practice | Typical Measurement or Requirement | Why It Matters |
|---|---|---|---|
| Power connection | No mains wiring is normally required because the light uses an integrated solar panel, rechargeable battery, and LED fixture. | Install the unit as a self-contained fixture; avoid routing a power cable through the ground or wall. | Fewer wiring steps reduce installation time, excavation, and the need for an electrician in many low-voltage residential applications. |
| Solar panel exposure | Place the panel where it receives direct sunlight for most of the day and is not shaded by buildings, trees, fences, or roof overhangs. | Aim for approximately 6–8 hours of direct sunlight when possible, depending on season, location, and product design. | More sunlight generally provides more battery charging energy and improves nighttime operating duration. |
| Mounting height | Use a lower position for pathway guidance and a higher position for broad-area illumination or wall security lighting. | Pathway lights: about 0.3–0.9 m above ground. Wall-mounted lights: commonly about 1.8–2.4 m above ground. | Height affects light coverage, glare, accessibility, and the amount of illumination reaching the intended area. |
| Pathway spacing | Stagger lights along both sides of a path instead of placing every fixture in one straight line. | Use approximately 1.8–3.0 m between pathway lights as a starting point, then adjust for beam angle and brightness. | Staggering reduces dark gaps and creates more even visual guidance without requiring continuous wiring. |
| Mounting surface | Choose a firm, stable surface such as a solid wall, timber post, masonry, or compacted soil suitable for the supplied stake. | Keep the fixture level and use compatible screws, anchors, or ground stakes for the surface material. | A stable mount keeps the solar panel aligned and prevents vibration, leaning, or movement during wind and rain. |
| Panel orientation | Position the panel toward the strongest available sunlight and adjust its angle to minimize shading during peak daylight hours. | In the Northern Hemisphere, south-facing placement is often favorable; in the Southern Hemisphere, north-facing placement is often favorable. | Orientation influences the daily solar energy collected, especially during shorter winter days. |
| Light direction | Point the LED output toward the walkway, steps, entrance, garden feature, or other target area rather than directly toward eye level. | Use a slight downward angle for paths and steps; avoid aiming the light toward neighboring windows or passing traffic. | Correct aiming improves visibility while reducing glare and unwanted light spill. |
| Drainage and clearance | Do not place the fixture in a location where water regularly pools, snow covers the panel, or vegetation blocks the sensor. | Maintain clear space around the panel, LED lens, and motion sensor; follow the product's stated weather-resistance rating. | Good drainage and ventilation help protect electrical components and maintain reliable sensor and charging performance. |
| First-use preparation | Remove protective packaging, turn the operating switch on, and allow the battery to charge in daylight before evaluating nighttime runtime. | Provide at least one full sunny day of charging when the manufacturer's instructions do not specify a different period. | The initial charge helps the battery reach a useful operating state before the first evening of use. |
| Seasonal adjustment | Recheck the panel and clean away dust, leaves, snow, or other obstructions at regular intervals. | Inspect monthly or after severe weather; increase inspection frequency in areas with heavy foliage or snowfall. | Seasonal changes alter sunlight duration and shading, so small position adjustments can improve charging consistency. |
Solar-powered lighting is easy to install outdoors because it usually needs no trenching, mains wiring, or electrical outlet. However, outdoor conditions strongly influence charging and nighttime performance. Direct sunlight matters most. Shade from walls, trees, or nearby structures can reduce daily energy collection, even when the area looks bright. Cloudy weather also lowers output, while winter brings shorter daylight hours and weaker solar angles.
Dust, pollen, and bird deposits can cover the panel surface. Snow can block charging completely. High temperatures may also reduce battery efficiency and shorten service life. A widely cited NREL review found a median photovoltaic degradation rate of about 0.5% per year, although actual results vary by climate and maintenance. The International Energy Agency Photovoltaic Power Systems Programme also identifies temperature, moisture, soiling, and shading as important factors in system reliability. These figures describe photovoltaic systems generally, not every outdoor lamp.
Tips: Place the panel toward the strongest daily sunlight, not merely the brightest-looking spot. Keep it away from permanent shade. Wipe the surface after dusty or pollen-heavy periods. Check drainage after heavy rain. An IP-rated enclosure helps resist water and dust, but it is not waterproof forever. Battery performance can fall during freezing nights, so local winter conditions deserve attention. Small oversights matter. A convenient installation can still perform poorly if the site is chosen too quickly.
Most include a solar panel, rechargeable battery, charge controller, and LED. The parts work together without a household power cable.
Usually not. A controller can manage charging and switch the light on at dusk. Some models also use a motion detector.
Choose a spot with several hours of direct sunlight. Keep the panel clear of roof overhangs, thick branches, and fence shadows.
In the Northern Hemisphere, a south-facing panel often gets strong sunlight. Nearby buildings can change the best angle, though.
Hold it at the planned height and inspect its beam after dark. Check again over several days. One sunny afternoon can mislead.
Push a ground stake into firm soil, or attach a wall fixture to a stable surface with suitable screws. Avoid loose boards.
Space them so their beams overlap slightly. This can reduce dark gaps between bright spots. Small adjustments matter.
Clean the panel and remove leaves that block sunlight. Leave room to reach it. Winter performance may be lower; I wouldn’t assume summer results will last year-round.
Solar-powered outdoor lighting is easy to install because each light collects energy through a built-in solar panel, stores it in a rechargeable battery, and uses that power after dark. With components such as the panel, battery, light, and controls integrated into one unit, there is generally no need to run electrical wiring. This makes placement more flexible and can simplify setup.
How to install solar-powered lighting outdoors depends on choosing a location that receives ample direct sunlight and positioning the light to illuminate the intended area. Secure the unit to a suitable surface, follow its setup instructions, and angle the panel toward the sun where possible. Shade, cloudy weather, dirt on the panel, strong wind, and extreme temperatures can affect charging or performance, so consider local conditions and keep the panel clear. A carefully chosen position helps the light charge reliably and provide useful illumination.

ApexSun Solar